How to connect QuickBooks Online using Microsoft Flow Connector
Connect to QuickBooks Online using Microsoft flow custom connector.
In this article, you will learn how to connect to QuickBooks Online (QBO) from Microsoft Flow using a Custom Connector. This approach provides a way to build forms in Microsoft PowerApps that integrate with your accounting data stored in QBO for things like recording employees timesheets, creating invoices, etc. This article demonstrates how to update a SharePoint list item from a value in QBO. Specifically, the Flow will look up the customer name based on the customer ID entered into the SharePoint list item. Please follow the Article I have tried to cover each steps.
Prerequisites
Intuir Developer Account Intuit Developer Account
Download Postman App Click Here to download
Microsoft Flow Subscription Sign Up Free for Trail
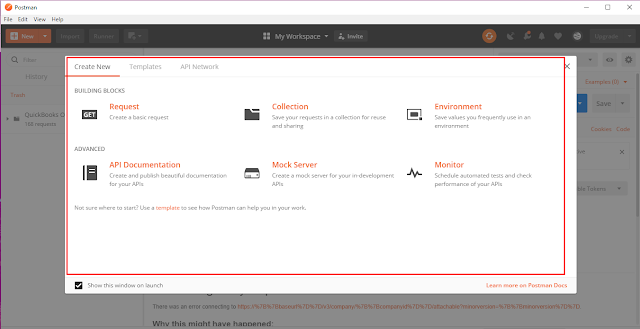
Open the POSTMAN app, It will look like this
Microsoft Flow Subscription Sign Up Free for Trail
Also Read - How to connect SharePoint with PHP
Also Read - How to get and Set the Lookup Fields in MS Dynamics 365.
Also Read - How to change the Status (StateCode) field value in MS Dynamics 365 using JavaScript.
Also Read - How to change the Status (StateCode) field value in MS Dynamics 365 using JavaScript.
Create Postman Collection
There is two way to import the Quickbook Postman Collection.
1- We will try to import collection directly from the POSTMAN.
Open the POSTMAN app, It will look like this

Now Click on the API Network and Type Intuit in the search box.

Click on the Intuit, It will open the API Collections and Then click Run in Postman button from QuickBooks Online API Collections.

Quickbook Collection will be imported into the Postman Collection Tab Now.

2- Now, We will try to import QuickBooks Collection from the QuickBooks Online
Start importing Postman collection from Intuit Developer website into Postman Click Here
Click on the Run in Postman button from QuickBooks Online collection of individual resources endpoints, using OAuth 2.0 authorization.

You should see the new imported collection in Postman collection Tab.

Expand the Collection QuickBooks Online API Collection and go to Customer and Click on the Customer- Read ALL.

It will open Customer - Read All Tab in the Postman. Go to your QuickBooks App and Copy the Base URL and Company ID of your Company. (Don't know how to get the Base URL and Company ID? Don't worry, Just click here). Rename the Request URL like this
URL - https://{{baseurl}}/v3/company/{{companyid}}/attachable?minorversion={{minorversion}}
1- {{baseurl}} - Your Companies Base URL
2- {{companyid}} - Your Company ID
3- {{minorversion}} - 8
After updating the URL, It should look like this
https://sandbox-quickbooks.api.intuit.com/v3/company/123146282221414/query?minorversion=8
If you are accessing a production QBO environment replace {{baseurl}} with quickbooks.api.intuit.com

Also Read - How to connect SharePoint with PHP
Now Click on the Authorization then Select OAuth from Type section.
Now Click on the Get New Access Token Button (Please Refer below Image).

It will open a Pop-Up Box, There You have to fill some value to get New Access token.
- Token Name - Token Name
- Grant Type - Authorization Code
- Call Back URL - https://app.getpostman.com/oauth2/callback (Make sure to add this URL in the QuickBooks App Redirect URL, Don't know how to add URL? Don't worry I'm here to tell you. Please click here)
- Auth URL - https://appcenter.intuit.com/connect/oauth2
- Access Token URL - https://oauth.platform.intuit.com/oauth2/v1/tokens/bearer
- Client ID - Your App Client ID (If you don't know how to get the client ID then Click Here)
- Client Secret - Your App Client Secret (If you don't know how to get the client Secret then Click Here)
- Scope - com.intuit.quickbooks.accounting openid email profile
- State - 1
- Client Authentication - Send client credentials in body.
After Filling all the Values Click on the Request Token Button.

Fill the Username and Password in the open window and Click on the Sign In Button

QuickBooks will ask to connect your app. Click on the Connect Button

It will get the Access token for the App and then Open a window with Access Token.
1- Access Token- Your access token
2- Token Type - Bearer
3- Expires_in - 3600
Now Click on Use Token Button.


Select the newly created Access Token if that is now Selected. You can my Token Name Is Just Token Name So If you want to change the Token Name then Please Change it when you request to get the token name.

Click on the Body Tab and then Review your Query.
The query should be: Select * from Customer startposition 1 maxresults 5

Click on Send button from the TOP. Review your results.

Export the Collection
Create New Collection in Postman. Click On New from the Top Left then click on Collection. Fill the Name and then Click on the Create Button. Save the Customer- Read All Request to this Collection. Please refer to the below image.
Select the Collection then Click on the Save button

Fill the Name and click on the Save to QBData (QBData is Collection name).

Now export the collection from the Postman

Make Sure to select Collection v1 because Microsoft flow only Support Collection v1. Click on the Export button.

Also Read - How to create a clone record using JavaScript in MS Dynamics 365 and Open the Record in New Window
Navigate to Microsoft Flow/PowerApps in Office 365
Now go to the Microsoft Flow and click on the Setting button then Custom Connectors

Now click on the Create custom Connector and then choose to Import a Postman Collection.

Fill the Connector name in the Name Column and Click on the Import. Choose the JSON file from the Computer which you exported before then Click on Continue Button

It will open a new page. In the General tab, there are Color, Description, Scheme, HOST, BASE URL field.
If you want to upload Icon for the connector. you can upload it. Change the Color, Description and leave rest as default.

In the Security tab, Choose Authentication Type OAuth 2.0. Fill these value.
- Identity Provider - Generic Oauth 2
- Client ID- Your App Client ID
- Client Secret - Your App Client Secret
- Authorization URL- https://appcenter.intuit.com/connect/oauth2
- Token URL - https://oauth.platform.intuit.com/oauth2/v1/tokens/bearer
- Refresh URL - https://oauth.platform.intuit.com/oauth2/v1/tokens/bearer (Same as Token URL)
- Scope - com.intuit.quickbooks.accounting
- Redirect URL - It will be Auto-generated by Flow.


In the Definition tab, Leave everything as Default. you can refer below images.


Now Click on the Create Connector Button. Your connector should be created now. In the Test Tab, Create New Connection to test your Connector.

Before Creating New Connection, Please update the Redirect URL to QuickBooks App.
Go back to the Security Tab and Copy the Redirect URL.
Go back to the Security Tab and Copy the Redirect URL.
Redirect URL - https://msmanaged-na.consent.azure-apim.net/redirect

Also Read - How to get and Set the Lookup Fields in MS Dynamics 365.
Also Read - How to change the Status (StateCode) field value in MS Dynamics 365 using JavaScript.
Also Read - How to change the Status (StateCode) field value in MS Dynamics 365 using JavaScript.
To Update Redirect URL in the QuickBooks App, Please go to the App Dashboard then Click on the App, Now go to the Key Tab and Scroll Down. Add the Redirect URL and Save.

Now Click On the New Connection and Fill the Username and Password then click on Sign In Button. It will ask to connect the Flow to QuickBooks then Click on Connect button. Now you will be redirected back to Flow that means your connection successfully created.

Test your connection and API Call. Enter a valid query and Click on the Test Operation.
Query- select * from customer

Check your results which you received in Body and Close the Connector.

Create the Following Sharepoint List in SharePoint site.
Columns -
Customer ID - Number
Customer Name - Single Line Text

Now go to Microsoft Flow and Create a blank flow. Your flow should look like this
The query in the Body Column should be- select * from customer where id = Customer ID (Choose Customer Id from - when and Items is created)
and
Customer Name expression should be set to- body('QBOQuery')['QueryResponse']['Customer'][0]['DisplayName']
QBQuery is an Action Name.

Now add a new Item in SharePoint List, Your will be triggered, check the list Customer Name. It should populate the Customer name now.

That's all for now. Let me know if you have any error. I will try to help you with that.
Also Read - How to connect SharePoint with PHP
Comments
Post a Comment