How to connect Tsheets using Microsoft flow connector
Create Microsoft Flow Custom Connector to Connect TSheets 2020
In this article I am going to explain the steps to create Microsoft Flow Custom Connector to connect TSheets by QuickBooks. I have got so many Questions from readers asking for this so here I am writing this article for them.
First You will have to create your Tsheets Account from here. Now we will need to create an app in Tsheets to connect Microsoft Flow.
Go to the Feature Add-ons in the bottom right and choose Manage Add-ons
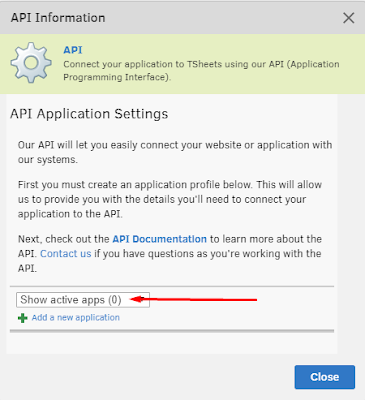
It will open a new Pop up, Search for API.
Now click on the Install Button. Then you will see there is no active app.
Also Read - How to create Ubuntu VM in Microsft Azure Portal
Also Read - How to connect SharePoint using PHP
Click on the Add a new application and Fill the Values and click on the SAVE.
Name - <Your Application Name>
Description - <Your Application Description>
Technical Contact - <choose the Technical Person>
Oauth Client ID - <will be generated for you>
OAuth Client Secret - <will be generated for you>
OAuth Redirect URL - <put your redirect URL>
NOTE - As for now we are creating this app to create MS Flow custom Connector and we didn't create Custom connector now so we can use any random URL as OAuth Redirect URL for now as I have used my website URL. Later We will change it when MS Flow will generate the custom URL.
It will generate the Oauth Client ID and OAuth Client Secret.
Now we have to create Microsoft Flow Custom Connector. Sign to your account from here.
Also Read - How to change the Status (StateCode) field value in MS Dynamics 365 using JavaScript.
Also Read - How to create a clone record in MS Dynamics 365 using JavaScript
Also Read - How to create a clone record in MS Dynamics 365 using JavaScript
Go to the Data tab from right pan and click on Custom Connectors. Now click on the New custom connector and Choose Create from blank.
In General Tab-
Scheme - HTTPS
Host - rest.tsheets.com
Base URL - /
In Securty Tab -
Choose what authentication is implemented by your API - OAuth 2.0
Identity Provider- Generic Oauth 2
Client id- <Enter your app client id from Tsheets App which we generated in above steps>
Client secret- <Enter your app client secret from Tsheets App which we generated in above steps>
Authorization URL - https://rest.tsheets.com/api/v1/authorize
Token URL - https://rest.tsheets.com/api/v1/grant
Refresh URL - https://rest.tsheets.com/api/v1/grant
Scope - <leave it blank>
Redirect URL - https://msmanaged-na.consent.azure-apim.net/redirect (URL will be generated by MS Flow when you will save the flow)
Click on the New action under Actions and then fill the Columns like Summary, Description, Operation ID and Visibility as I have filled in the below image.
In the Request Section click on the Import from sample and Fill the values
Verb - GET
URL - https://rest.tsheets.com/api/v1/users (Here I want to get all the users thats why I'm using this URL)
Headers - Content-Type Application/Json and Accept Application/json
Click on the Import. It should now look like this
In Test Tab -
Before doing anything in the Test tab we will need to update the Redirect URL into our Tsheets App. So go back to Security tab and Copy the generated Redirect URL and add that to Tsheets App Redirect URL.
Now click on the create New connection. It will open a new Popup window. Fill the Email or Username and click on Continue and then Enter your Password click on Sign in.
and then Allow access to your App.
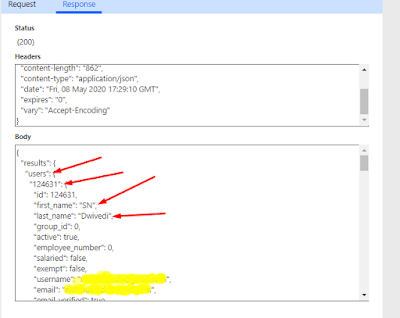
Now we will test the Connector if it is working. So Now click on the Test Operation from Test Tab.
That's all for now. Let me know if you have any error. I will try to help you with that.
Also Read - How to connect SharePoint with PHP


Comments
Post a Comment